
All steps needed to add a fourth socket outlet
By adding a single additional space, we can improve the situation of our many cables. We can do this autonomously, without the help of a professional and without spending a fortune, but we must be careful to achieve every step perfectly and safely. Indeed, in order to be able to create this additional space, it is already necessary to have some manual skills, experience and knowledge of certain electrical components. If you have no experience and are not familiar with this type of work, contact an expert friend or professional. Today, let’s look at the steps in detail.
Tomada de energia – Imilanesi.nanopress.it
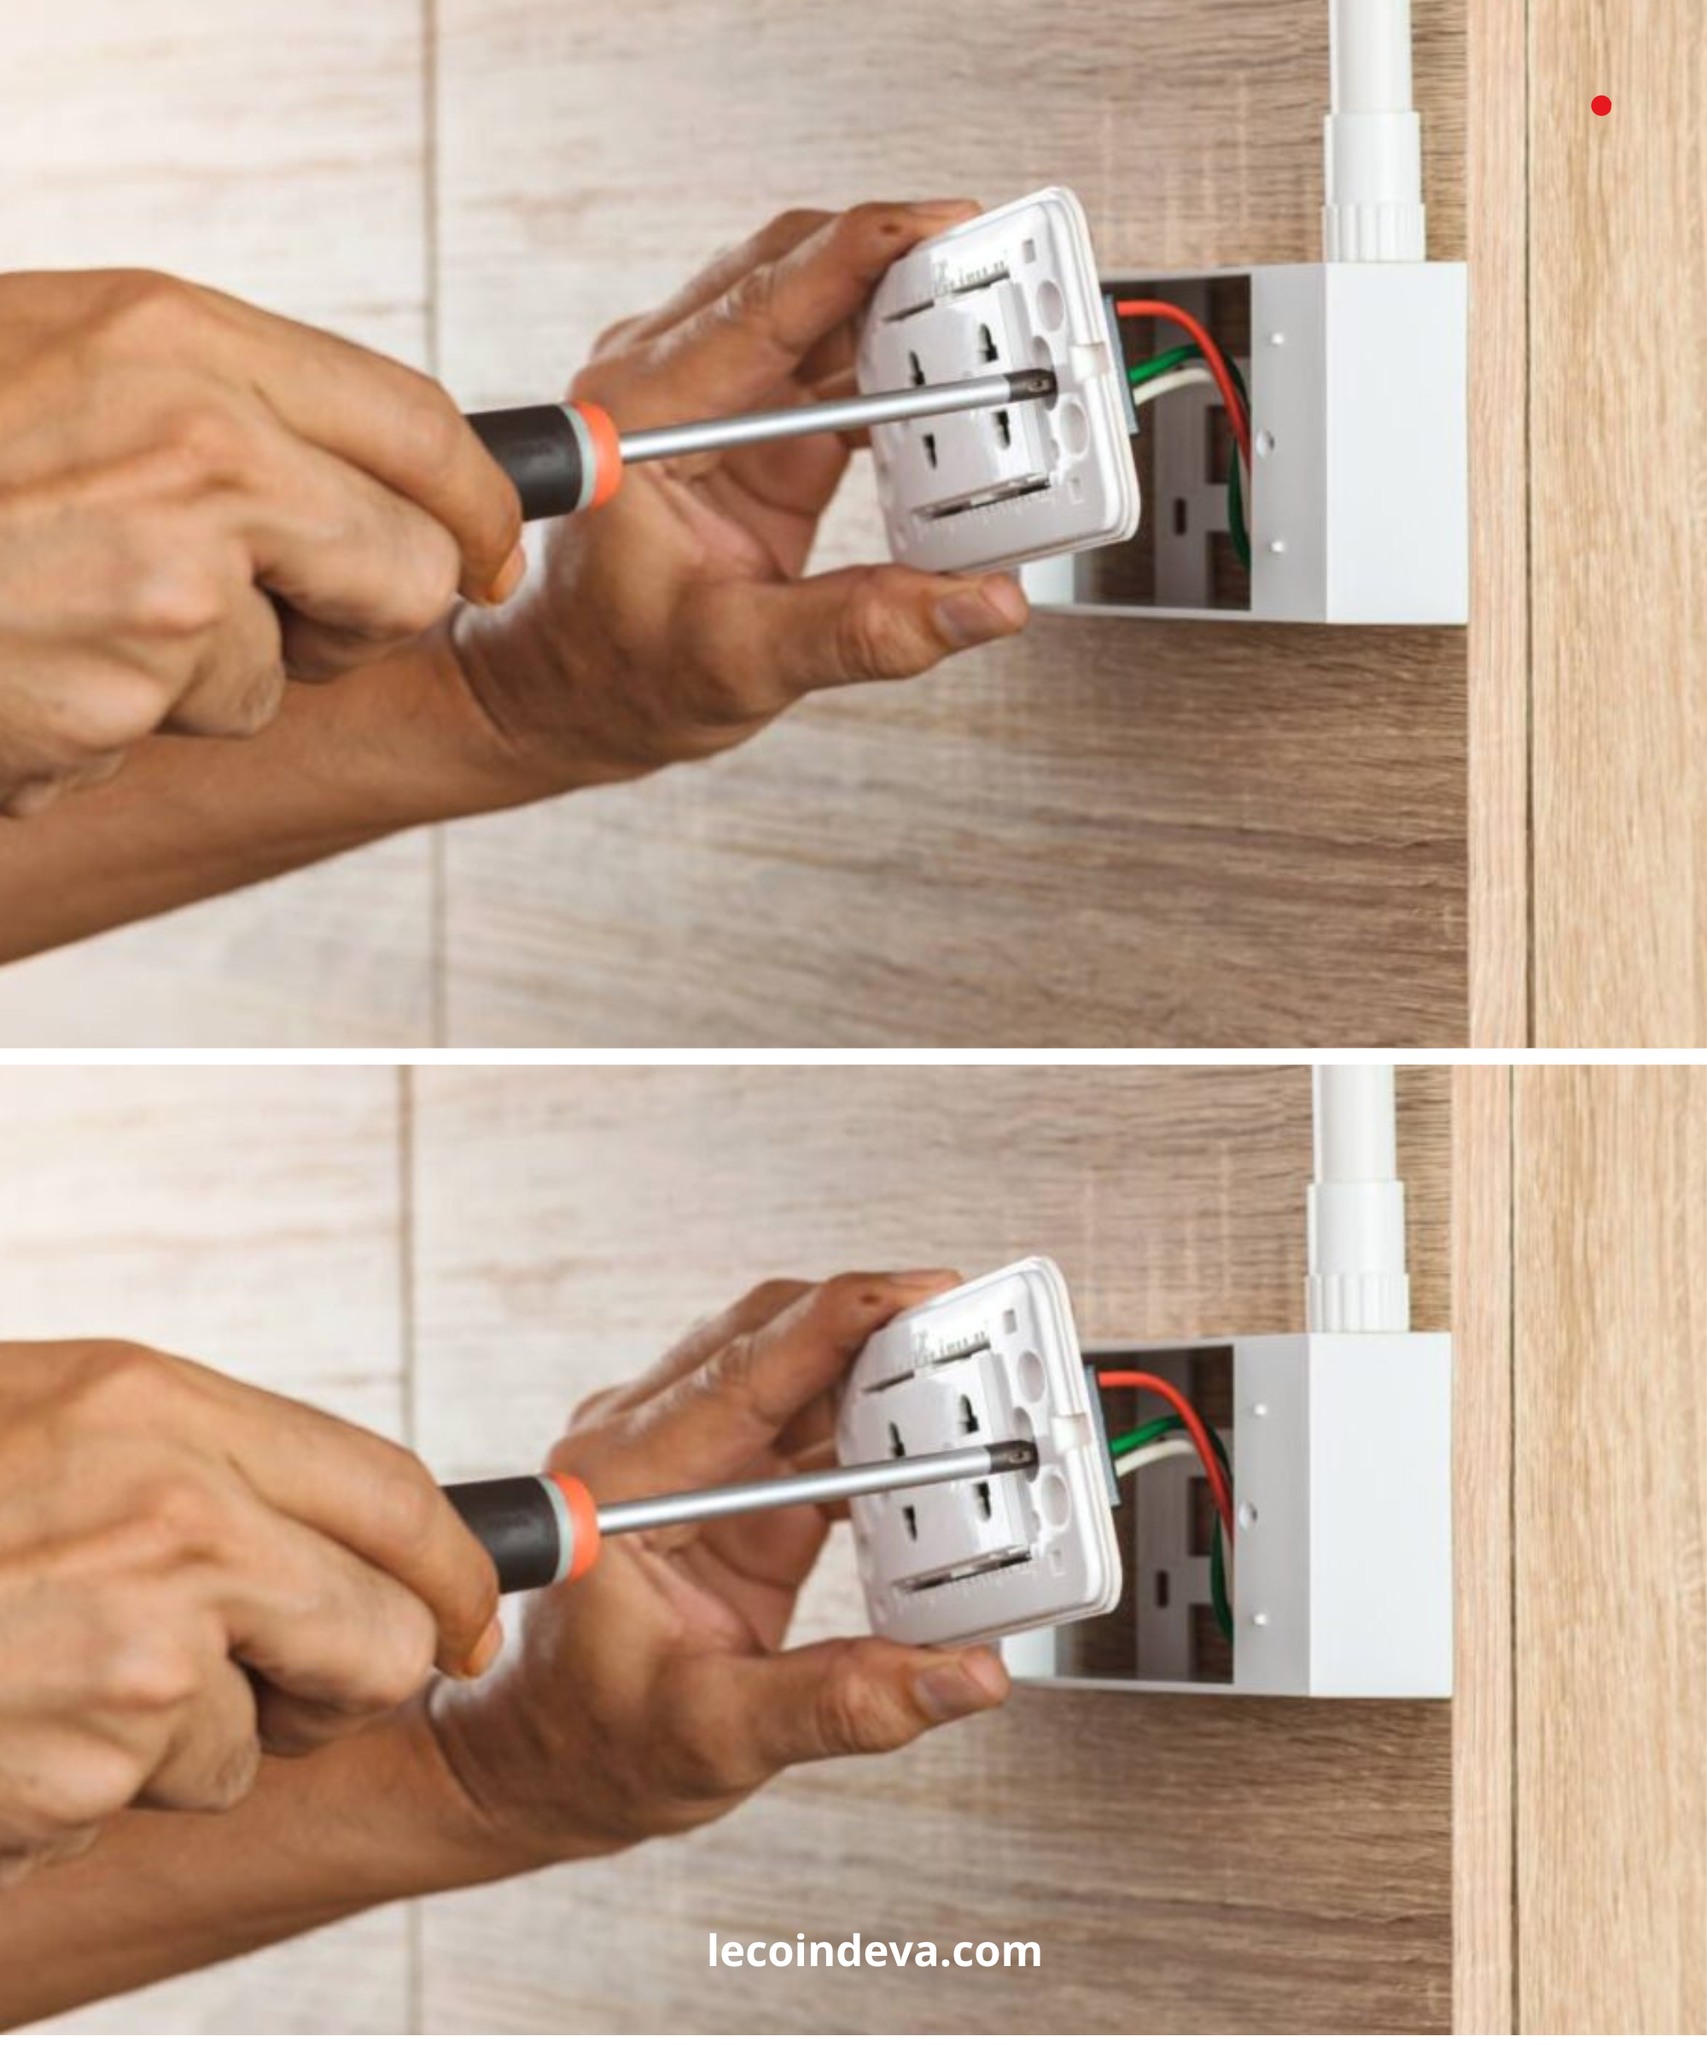
The first step is to completely cut electricity throughout the house to reduce risks to zero. Then you can remove the external mask using the screwdriver. Once the socket has been completely disassembled, the casing of the socket can be modified, from which, by means of a clamp, the fixing screws will be completely removed. This step is fundamental: by doing so, we’ll put four in . At the end of this operation, it will be necessary to connect the new socket using electrical cables of appropriate size. Let us not forget to pay them properly. Once the electrical connections have been made, we can start to assemble it all on the support, but we must first modify the two original screws that attach it to the fruit box and which, in our case, we will not be able to use.
We push the support into the wall dwelling to check that it adheres; if it adheres perfectly, we can continue to work. If this is not the case, it will be necessary to remove an additional a few centimeters from the dwelling from the screw to create the space necessary for the installation. When the support fits perfectly, it is time to screw the new mask by placing the screws in the outermost holes of the support, possibly using a pencil mark on the wall. You will need help from a drill. Once the operation is completed, the mask must be completely glued. Once the operation is completed, you will have an additional space in the socket without breaking the wall and a perfect aesthetic result.
